

With the first rip of the vinyl flooring, a wave of apprehension hit my gut. I had that same feeling when we began a big renovation project on our old house back in 2015 before our daughter Aurelia was born. Even with all the experience we gained from completely gutting our old house, redoing all the plumbing and wiring, this new RV-related project would be a completely new experience. What would we find? Would we even be able to do this? We had never renovated an RV before. We’ve only had our RV for a year and 7 months, and now we are diving into what could become Pandora’s box. Many would say it’s crazy to try and renovate an RV, but we had important reasons for doing so.
- Our Winnebago Sightseer motorhome is a 2008. The interior has had a lot of wear and tear on it, since we are the third owners.
- We despise the carpet in the RV. It’s a trap for dust, dirt, and any kind of spills from the kids and the dog. I am sensitive to dust allergens, and it was starting to get to me.
- As full-time RVers, this is our home. We want to make it feel like a home for our family and not just another standard RV.
- We want to make improvements to our RV — namely, the plumbing and adding a robust solar system to allow us the freedom of boondocking.
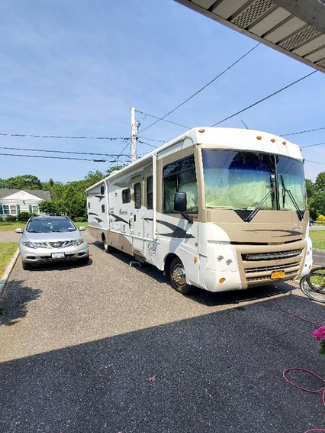
So, with these goals in mind, we began to plan our renovation. The first step would be to have a home base to allow us to work on the RV. Luckily, my mother was our gracious host, and we parked our 35-foot RV in her driveway on June 18th. We took over her garage and moved into her guest bedroom, and the work began. Bless my mother for allowing us to stay with her.
We had outlined a rough idea of what we wanted the RV to look like when we were done, and we had some important items that we wanted to accomplish. We considered this Stage 1. Stage 2 would be any kind of cosmetic design or finishes that could wait till we hit the road. Some of the main items are listed below.
- Remove all carpet and flooring and install new flooring.
- New toilet.
- New kitchen counter, sink, and backsplash.
- New couch for our living room area.
- Redo the dinette cushions and table.
- Replumb the RV with residential pex and fittings.
- Install solar system.
We decided against painting our cabinets and the walls inside the RV for a few reasons. Now, I know what some would say: All RVs that are renovated are repainted white, to make it brighter inside. Well, first off, we like the wood cabinets in our RV. We also know firsthand the labor to refinish cabinets and didn’t see the juice being worth the squeeze. We did go back and forth about painting the walls a lighter color, but in the end, we don’t mind the RV wallpaper in our rig. It just works for us.
The one important lesson I learned from our house renovation was that any estimate in time should be at least doubled. I may have learned that lesson, but I must have forgotten it. So, when Jordana and I discussed our timeline, I firmly believed a month to a month and a half would be sufficient time to complete our renovation. Nope. Totally wrong. And let me tell you why. Inevitably, some things you just can’t plan for, and from a creative perspective, some projects take time to come to life. Sprinkle in some mess-ups, supply issues, and just good ole life with two little kids, and you have a three-and-a-half-month RV renovation in the making.
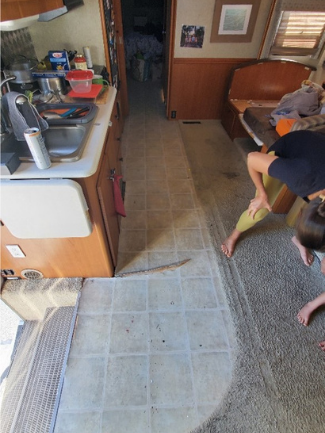
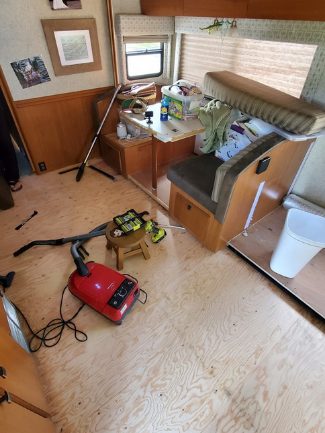
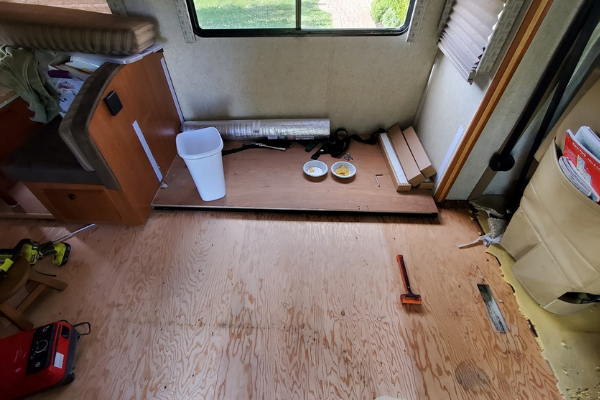
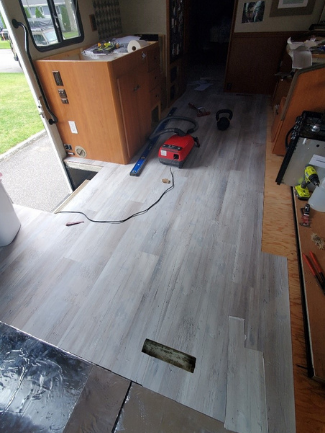
We began by tearing out the carpet and vinyl flooring. We had a pep in our step and were eager to begin this transformation. The builders of our RV had other ideas. Holy staples, foam, dirt, dust, glue, and more glue….and more glue. Aurelia earned $5 for all the staples she pulled out. There were so many, and they were literally everywhere. And when I say a lot of glue, I mean a lot. In any spot that could not be stapled, they glued with copious amounts of this substance that mocked us during our attempts at removal. This was the Pandora’s box I had envisioned, and I already began to see that this renovation would take longer than expected.
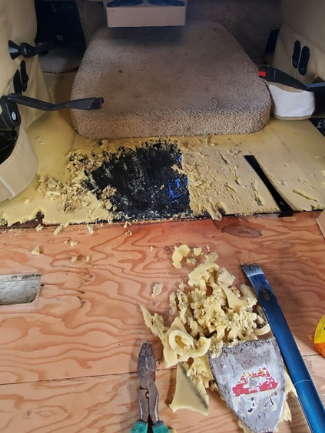
One thing I was beginning to learn about was RV construction and how different it truly is from a regular ole sticks-and-bricks house. The biggest hurdle was removing the carpeting that goes under the slide. This was a huge undertaking, as it goes over a slide guide and then gets tacked on the subfloor by the outside of the RV. One also must realize that the slides are fully assembled separate from the RV. The RV flooring is put down and then the slide is put in. It took some ingenuity to remove all the carpeting and a little help from our friend the crowbar.
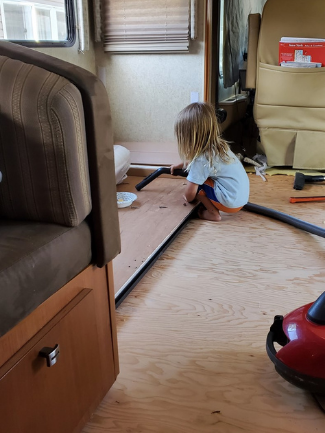
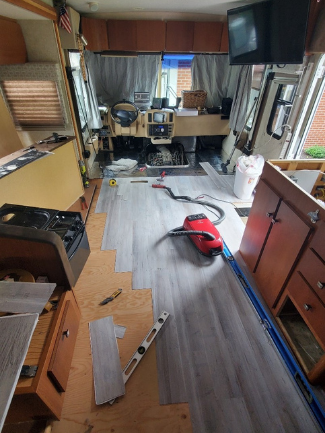
Once all the carpeting and flooring were removed, we were able to begin laying down new vinyl flooring. We decided to go with peel-and-stick vinyl planks for a variety of reasons. Installation is simple. No use of flooring glues. The planks are thin, lightweight, and can be cut with a scissor or razor blade. And in the event of a piece getting gouged, it can be peeled off and replaced. The biggest thing to always remember before installing flooring is to make sure you square everything off, so the floor looks good. We decided to run the floor lengthwise, and once we got moving, it didn’t take long before we saw some good progress.
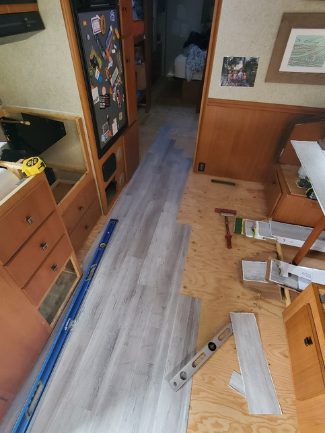
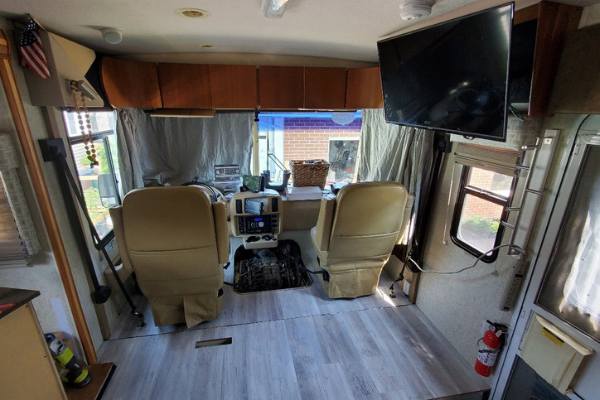
The demo and the new flooring were a big project, and it is coming close to being finished. While multitasking this project with our long list of to-do items, we were happy to see the difference a new bright flooring would have on our RV. To see and learn more about our renovation, visit our YouTube channel, https://www.youtube.com/c/wandertogetlost and look out for our next renovation blog.
Stay Lost!
|
JP Latkovic is a former New York State paramedic and Critical Care Flight paramedic from Long Island, NY. JP; his wife, Jordana; and kids Aurelia and Odin just made the leap to full-time RV living. They recently completed their RV renovation and have hit the road again. |
Leave a Reply