
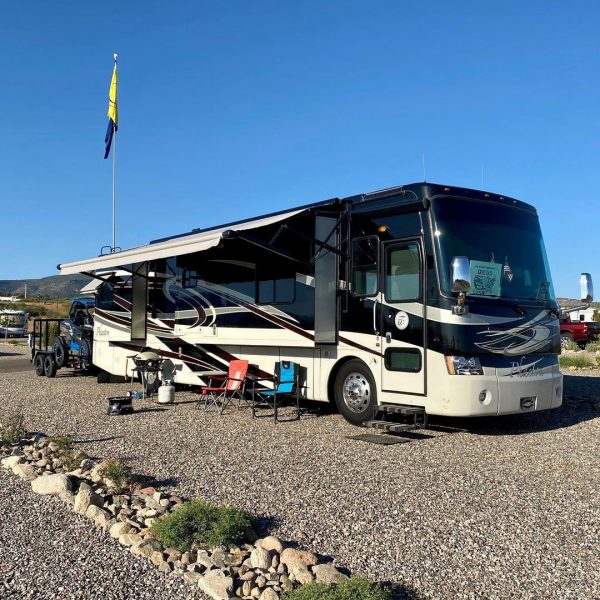
As I’ve said before, we got really lucky finding our new-to-us Tiffin Phaeton. It was well taken care of, with low miles, and was exactly the layout we were looking for. Kudos to Mark for searching and searching. Even better, it was only 20 minutes from our house! The previous owners used it to drive from their summer home to their winter home, keeping it covered in both places. We were told the reason they were selling was that they’d sold their summer home and would be living in Arizona full time. How do we know that, since we bought it on consignment? Because they left all the addresses in the GPS. We checked that yes, the summer address house did sell, and it had a large building on site. The winter storage place was indeed covered.
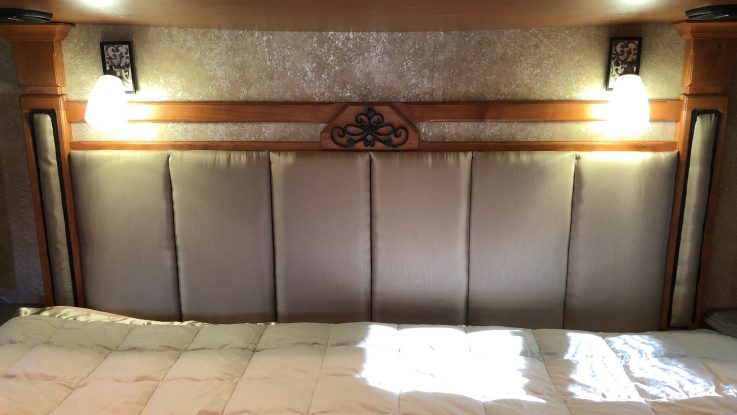
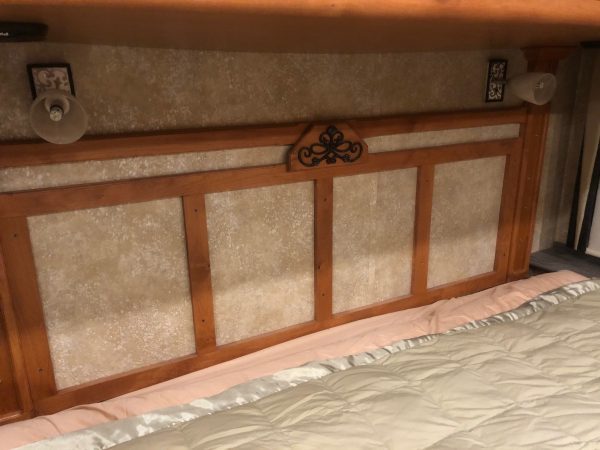
The only thing that bugged me was the headboard. There was a strange stain low on the left side of the fabric, most likely from a dog that slept in the bed. We know they had a dog based on the huge volume of black hair under and behind the couches when we did our first post-purchase deep clean. With everything else being nearly perfect in the coach, we’d just have to live with that stain.
It bugged me every time I looked at it, even when I propped our pillows in front of it. Each year it’s bugged me more. We often bring the coach to the house when we get the carpets cleaned, so they can do the coach at the same time. They tried a few times to get the headboard cleaned with zero success.
Still, it bugged me. I mean really bugged me.
Mark is always a good sport with my pet projects, but he looked at me with skepticism that we could even get the stain out. I told him that I would try first to clean it, and if we couldn’t, we would replace it. I didn’t have high hopes in getting it clean and had begun pricing new headboards.
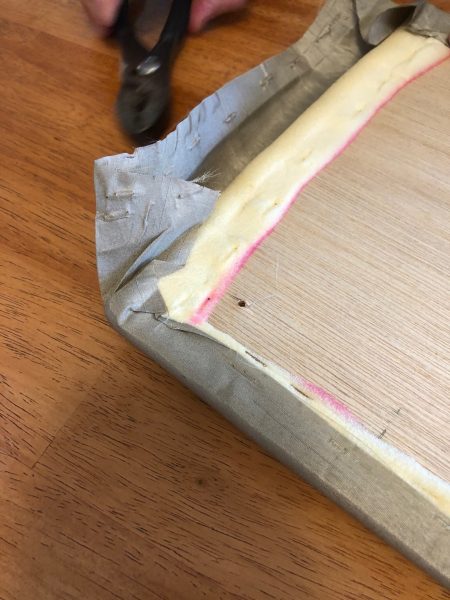
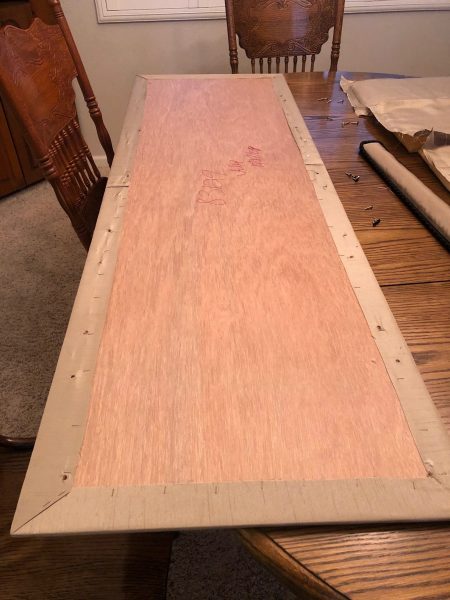
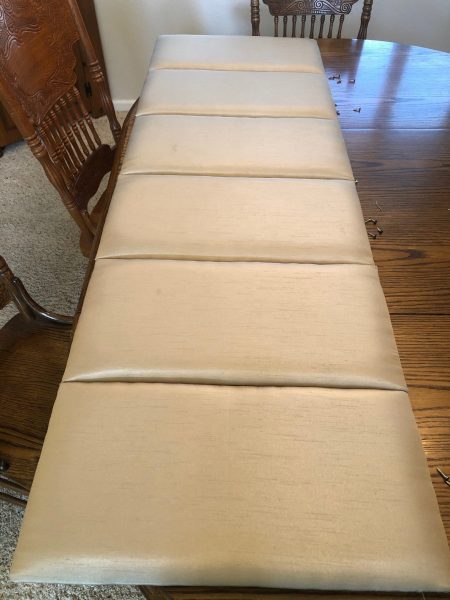
Off we went to storage. We discovered the headboard wasn’t hard to remove. Several good tugs was all it took. And, we had a surprise. What looked like one very large and complicated fabric tie-down was in fact one large covered piece of wood with six smaller padded and covered pieces of wood attached. Hey, this might not be so bad. The little side panels came off just as easily.
We laid it on our dining room table when we got home, and I begin investigating how to clean satin. So many different options. We didn’t know what made the stain, only knew that a professional couldn’t get it out. I figured it must be oil based. Those are the hardest stains in our house to get out.
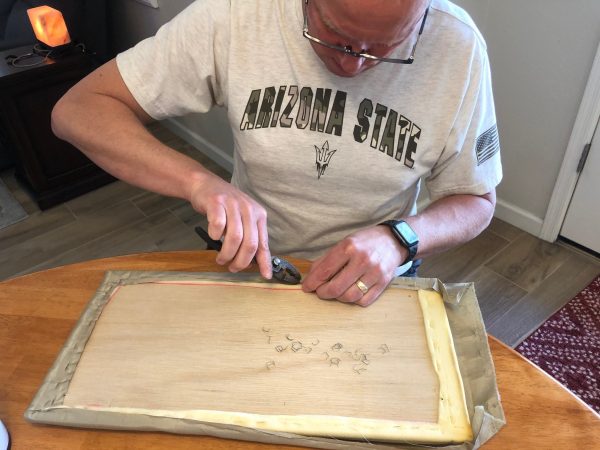
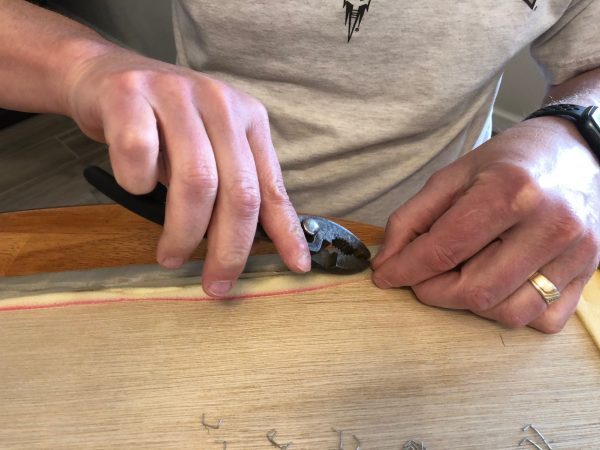
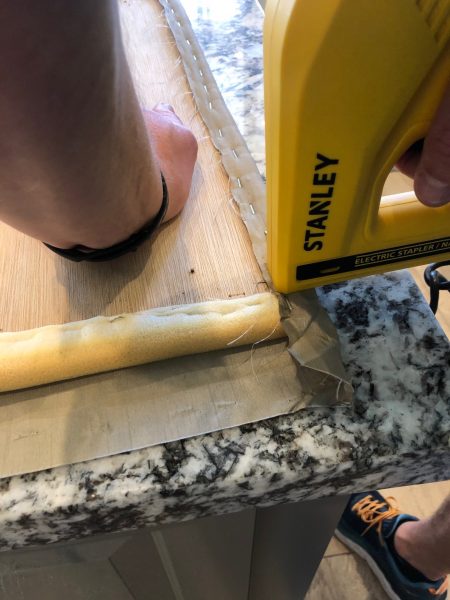
We carefully removed the fabric from the six panels. I say carefully because there must have been 100+ staples on each panel. Holy cow, they went crazy with the staple gun! Mark started with a paring knife to loosen the staple then pulled it out with pliers. I didn’t like the idea of putting a hole in the satin with the knife point, so we moved to the smallest, thinnest screwdriver we had, and that worked better for my liking.
After all the panels were off, it was my turn to figure out how to clean them.
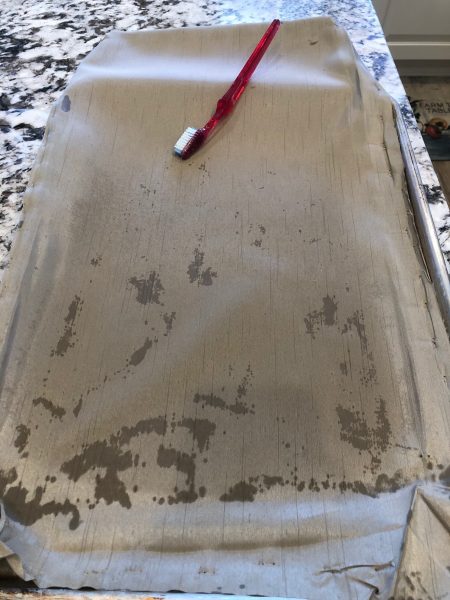
I started with the grossest one first, which, I should tell you, was on my side of the bed. Maybe that’s why it bugged me so much. It’s so gross just looking at it.
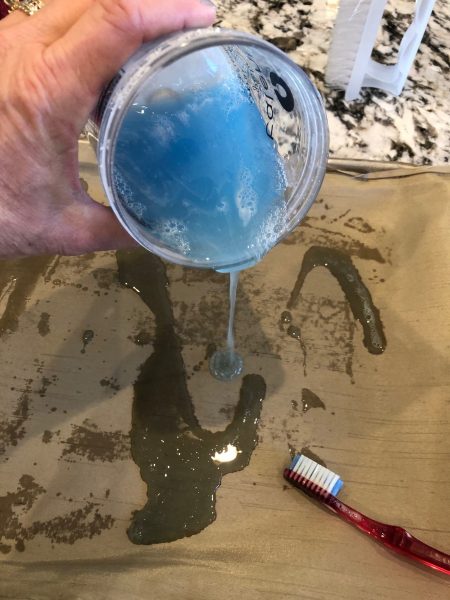
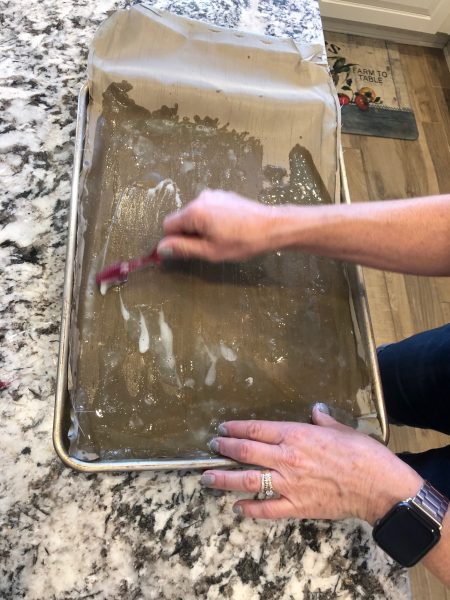
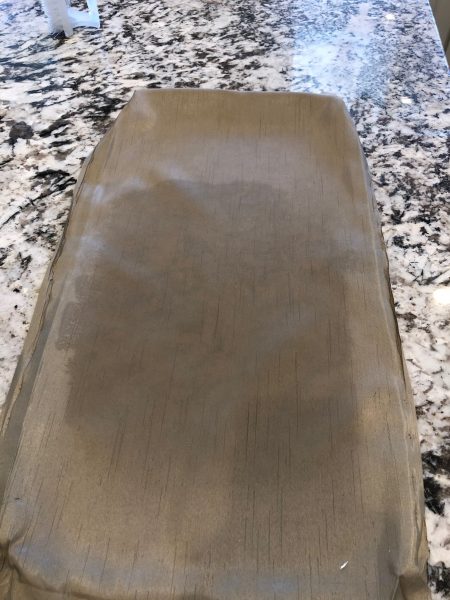
We had nothing to lose on trying to get it clean, so I used my handy-dandy homemade stain concoction. I put the fabric panel on a rimmed cookie sheet and poured the concoction on top and started scrubbing with a toothbrush. I have a scrubbing brush that’s much easier to use, but I was worried the stiffer bristles might damage the fabric. After scrubbing for what seemed like hours ― actually just a few minutes ― I let it sit there for an hour or so. Next, I threw it into the washing machine with all the towels in the house on the delicate cycle, at the dirtiest setting, with an extra rinse, and crossed my fingers.
I let the panel air dry by laying it over the stair banister. It looked good when I took it out of the washer, but sometimes it’s hard to tell if the stain is really gone while it’s still wet. I was cautiously optimistic, though. Satin dries pretty fast, so it didn’t take long to find that my homemade concoction worked. There was no trace at all of whatever that stain was! Even better, the fabric survived it all and was still intact with no damage. Woo-hoo!
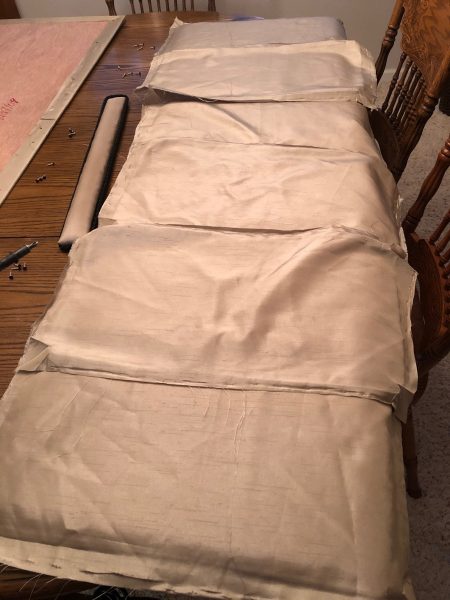
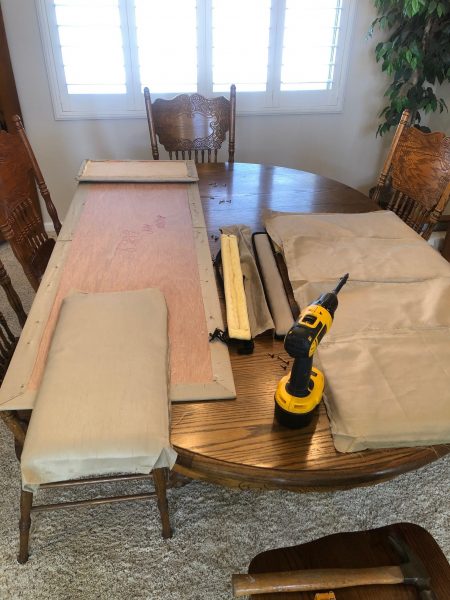
One down, five to go. One by one, each panel spent time on the cookie sheet getting scrubbed. I washed them on the same cycle, this time with beach towels I threw in to make a normal-sized load, and then I hung them on the banister. I washed them with only towels, because I didn’t want anything to snag the fabric, and the panels alone didn’t take up enough space for a good roll and clean by themselves.
Next up was to get the panels back on the padded board, something neither of us had ever done before. How hard can it be? We decided working on the kitchen island was best both for height and lighting. We laid the piece of fabric down and then put the padded board on top, padding against the fabric. I grabbed a leveler to make sure we had it perfectly straight, which was completely unnecessary. Hey, points for trying, right? We pulled the fabric up on all sides to make sure the board was in the middle and got to work.
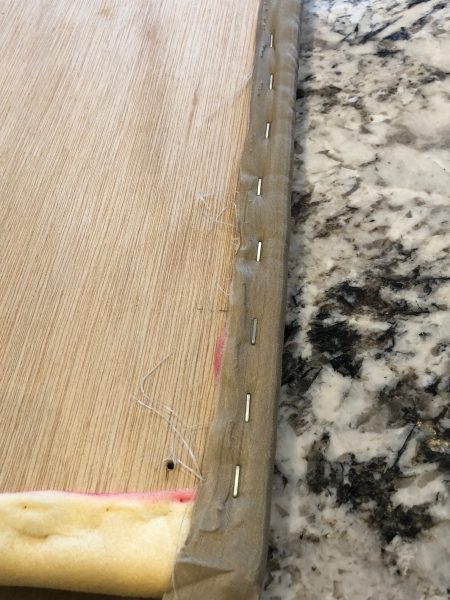
My job was to hold the fabric while Mark stapled it to the board. It was pull, hold, staple. Pull, hold staple all the way around, making an inward triangle fold at the corners. Honestly, the thought of getting the fabric back on correctly was rather intimidating to me. but it was so much easier than I thought. We kept the attachment station going until all six were done.
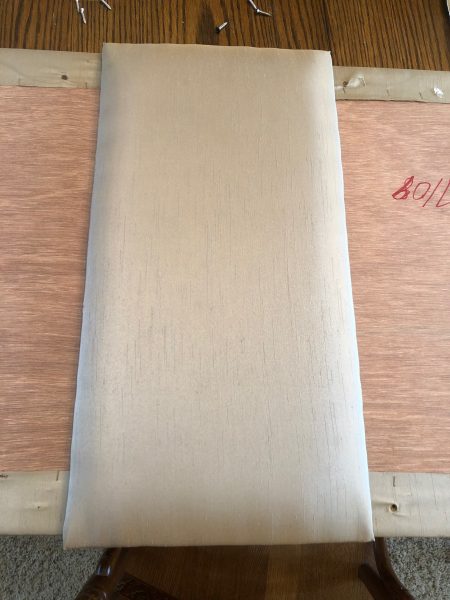
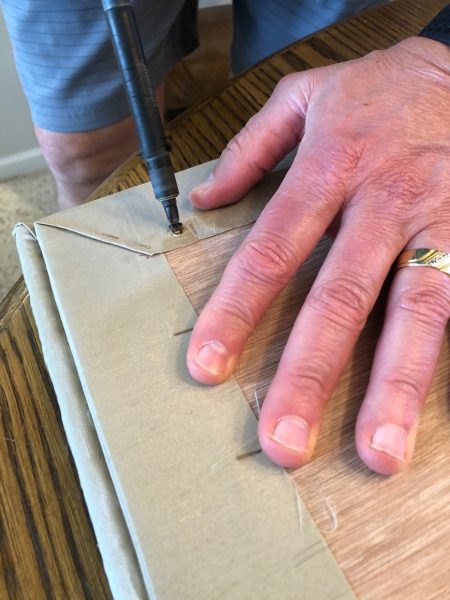
Next up was fastening them back to the board. No staple gun this time, since the panels were screwed into the big board. Back to the dining room table for this, because it was long enough. We laid the panels, finished side down on the table and placed the big board on top of them. Good thing I’d taken pictures of the panels positioned on the board before we took it apart. My job was to hold the first panel just as it was in the picture while Mark screwed it back onto the board. One by one we pulled the next panel as tight as we could to the previous one, held it in place, and screwed it in.
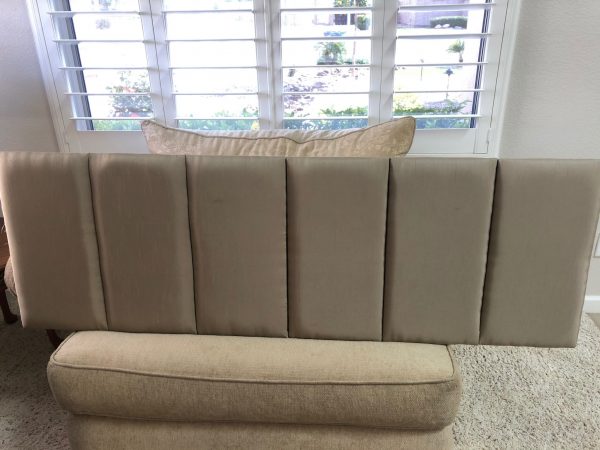
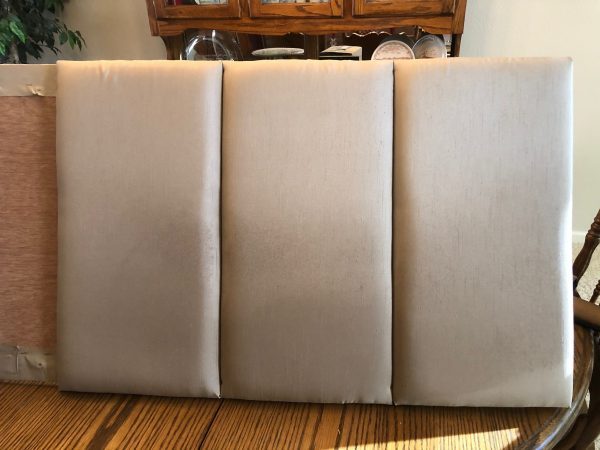
Viola! We did it! We exchanged a few high-fives as we looked at it, all clean and back together.
Now came the hard part: Getting it back on in the RV. The little side panels were screwed into the headboard frame, which meant to get them back on properly, we had to remove the headboard frame. Yikes. Mark had complete confidence that we could do it. Me, not so much. In my head, one wrong screw position and we’d have a screw sticking out the side of the RV. He reassured me that all would be fine, and he was right. Don’t tell him I said that.
We leaned the frame against the shower wall, and while I held it steady, Mark screwed in the two little side panels. The hardest part of this whole project wasn’t getting the fabric clean. It was getting the frame back on the wall level long enough for him to get the first two screws in. Holding it in place was my job. We pulled the bed down for more space to work, and it was just enough for me to get my feet in there for a good base. There I sat, knees pressing against the lower part of the frame for stability with my hands holding the top horizontal piece while Mark put the screws in. After getting the frame reattached, nailing in the headboard seemed easy.
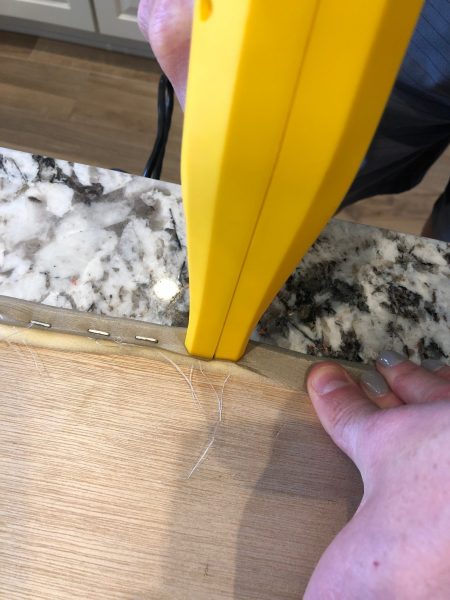
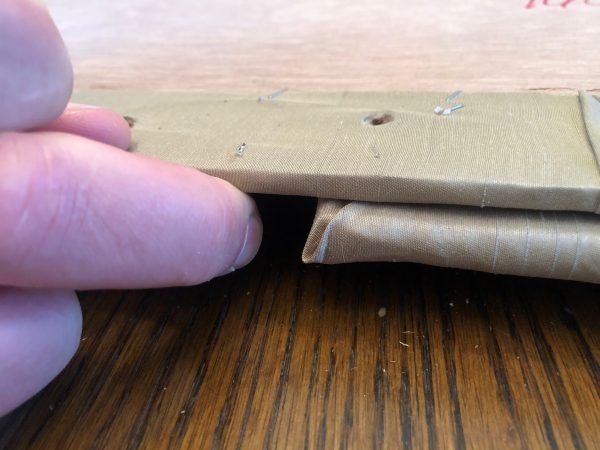
The factory used long staple gun nails without heads in between each panel. The nails for our staple gun weren’t long enough, so we had to use long, skinny nails. Not ideal, but that’s all we had. He positioned the nail between each panel while I held the fabric away. I was overly concerned about the hammer head ripping the satin fabric and ruining it after all our hard work. To ease my neuroses, Mark covered the fabric with a cloth for the last few hammer strikes. To make the nail heads almost invisible, he positioned a small awl perfectly on the nail head and gently hammered each one down.

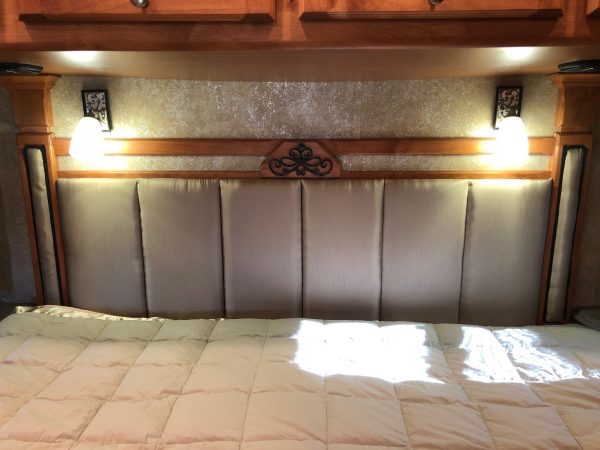
Project complete! On close inspection, you can tell we are rookies with fastening fabric to a padded board because there are minor puckers, but I don’t care. It’s clean, finally clean, and now there’s nothing at all with our coach that bugs me.
*Note: we have the original bedding and all the pillows safely stored in our house. We do too much dirty camping to have to worry about cleaning it. This washable coverlet is perfect for us.
Meet the Family
I’m Maureen Milne, F446881. Mark and I are becoming empty nest veterans and you know what, we enjoy it! We are always on the lookout for the next adventure, our friends call us the X-Games family. We are avid hikers, cyclists and skiers (both snow and water). Mark does triathlons and we run several races a year. We’ve been RVing together since we were teenagers and we love traveling with our two grown sons. I share our RV adventures, RV friendly recipes, wonderful campgrounds and more on my blog, M&M Hit The Road. You can also find our fun on Facebook, Instagram, Twitter and YouTube.
Awesome job! Loved all the pictures and explanations. I’m surprised that the fabric panel’s didn’t shrink or fray. Kudos!!