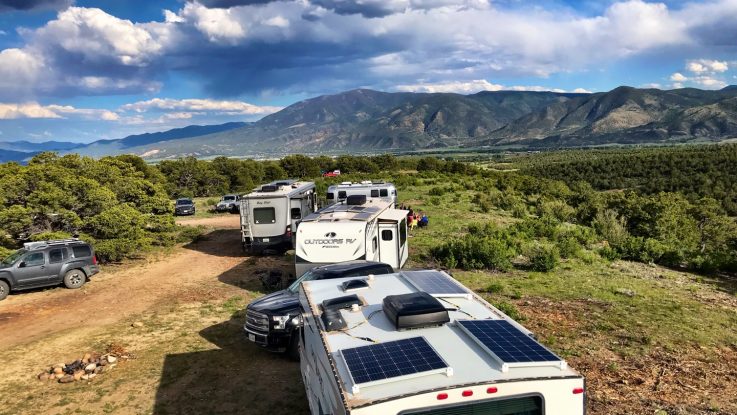
Like any other house, an RV requires power to run its many systems. Of course, the typical way for an RV to be supplied with electricity is by hooking up to a shore power pedestal at an RV park. But what happens when you don’t have access to an endless supply of electricity 10 feet away? Installing RV solar panels may be the solution.
Introduction to RV Solar Panel Installation
Last year I went through the process of figuring out how to design a complete solar system from scratch for Camp Addict co-founder Kelly’s 24-foot travel trailer. It isn’t a process for the faint of heart, and it stretched my brain muscle. I wrote a pretty comprehensive blog post on how to design an RV solar system if you are interested in diving in deep.
Below I’ll give you a high-level overview of things to consider. This is a good introduction to planning a solar installation. It will come in handy even if you choose to pay someone to do the install. (It’s always nice to understand what an installer is talking about instead of staring back like a deer in headlights.)
I’ll be straight up with you — most RVers aren’t going to need to spend money on solar. They just won’t get a return on their investment. Unless you find yourself frequently camping in places that don’t have an electrical outlet to plug into, solar probably isn’t a wise investment.
However, solar is a great choice for RVers who love the wide-open spaces that public lands offer. It’s also good if you enjoy public campgrounds that don’t necessarily come with utility hookups.
Why You Might Need RV Solar Panels
If you find yourself RVing in a spot without a power supply, you have a few options:
- A large enough house battery bank to sustain your power requirements for as long as you’ll be off the grid
Your RV house batteries may be able to last a day or two of dry camping (not being hooked up to utilities) if you go easy on your power consumption. Unless you’ve got some monster Lithium battery bank, this isn’t a viable alternative to off-grid power. (And, most likely if you do have Lithium batteries, you are going to have a solar panel setup anyhow). - A generator to recharge your RV house batteries when they get low
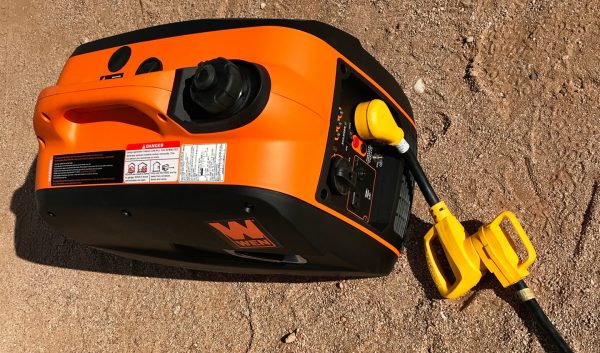
You can get a portable generator that provides a 120-volt source of power to your RV. Downsides are that generators are a source of noise to disturb your (and your neighbor’s) quiet. In addition, they require a gasoline supply. You have to maintain them if you want them to last, and they require space to store them when not in use. - Solar panels to convert the sun into a “free” source of power
If you are one who enjoys camping outside of the RV park environment, then installing solar panels on your RV’s roof is going to be the way to go.
Start Slow
First, consider how much energy your RV uses. One of the great questions when contemplating an RV solar installation is how many watts of solar do you need to install.
You can do a lot of fancy calculations to try and figure out how many amp-hours of electricity you will use in a typical day. This amount is going to vary greatly depending on what type of an RV you have, what kind of appliances are using power, and your individual power use.
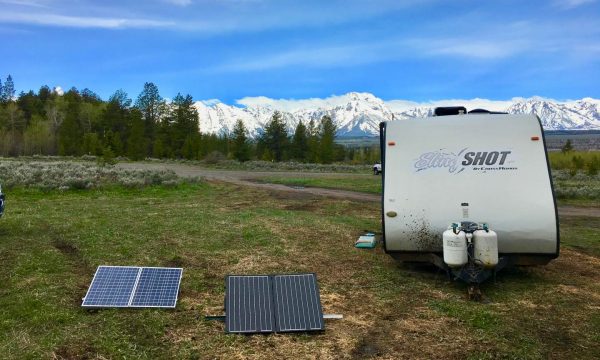
To “start slow,” I recommend buying a portable solar panel and use it for a while to get an understanding of how much power you typically consume.
Plus, a portable solar panel will come in handy if you do decide to do a full-blown solar install, as there will be times when your main solar installation won’t be in the sun (i.e. you’ve decided to park under trees for shade). You can use your portable panel to “extend” your solar reach.
Understanding Your Energy Usage
To truly understand how much power you draw from your RV house batteries, you need to have a battery monitor installed in your electrical system. This will be a vital piece of equipment if you do end up with a full rooftop solar install, and it even comes in handy if you just stick with a portable solar panel.
So what is a battery monitor? It’s simply a piece of equipment that reads the amps (power flow) into and out of your RV house batteries. This allows you to see how much power you consume daily.
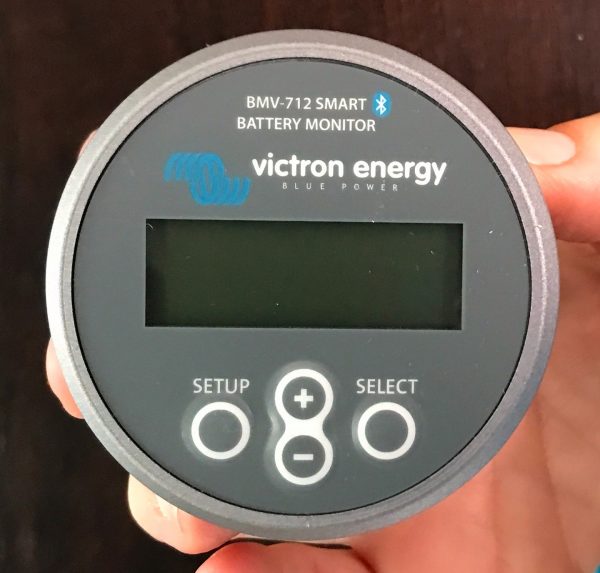
And, if you have a solar setup, it lets you see how much power is being “returned” to the battery.
There is no better way to figure out how many watts of solar you need to install than to first understand how much power you consume on a typical day. Simply put, installing a battery monitor first is a great way to make sure you end up with the right amount of solar production capacity.
How Many Watts of Solar
If you’ve been paying attention so far, this is the million-dollar question: how many watts of solar will you need?
If you’ve used a portable solar panel for a while and/or have a battery monitor installed, you will have a good idea of how much power you use in a day. Therefore, you will know how many watts of solar you need to produce this amount of power.
Is purchasing “just enough” solar panels the answer?
Well, not really. You will want to get more than you need for a couple of reasons:
- Solar panels will only generate their rated output under perfect conditions, and you will rarely (if ever) see these conditions. Perfect conditions include the panels being 90 degrees to the sun, which is the perfect solar panel temperature for optimal output.
- Solar panels only produce power on perfectly sunny days. If it is cloudy (or even partially cloudy), solar output is going to be greatly diminished. And if there is any shading of solar panels (read on for details about solar panel placement), they won’t produce power at all.
How many solar panels should I have total?
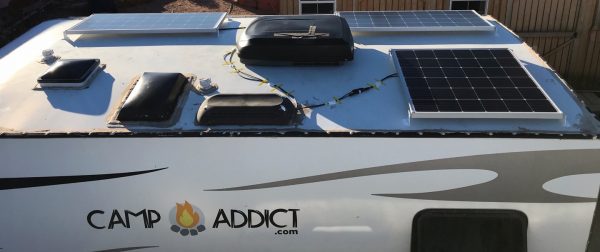
If possible, add 25 to 50% more solar output capability than you’ve figured out you need to compensate for installing your panels flat on the roof. This is for those inevitably cloudy days and those times when you use more power than normal. Of course, adding more solar panels will increase the cost — especially if you are paying someone to provide the labor. But as an overall percentage of the total installation, it shouldn’t be too bad. Plus, you’ll be really glad you added a little extra down the road. (Trust me on this one.)
Can I have too many RV solar panels?
Rarely do you find anyone who complains about having too much solar capability. I have yet to find that person but know plenty who wish they had more, including myself.
Consider this example: I mentioned that I designed Kelly’s solar system for her RV. With Kelly’s solar system we decided on 600 watts total (three solar panels at 200 watts each). She doesn’t need more than 400 watts of total solar input, so 600 watts gives her plenty of headroom for cloudy days and to compensate for the horizontal mounting of the panels.
Where To Place RV Solar Panels
Other than the obvious answer to where do solar panels go (the roof!), there are things to consider about their placement. I briefly mentioned above that solar panels don’t like shade. Let me expand on this…
As wild of a concept as this might be — yes, solar panels need to be in the sun to produce power. And, no, they will not produce power on a sunny day if the panels themselves are in the shade. They have to be in the sun, not just in the presence of the sun.
Any amount of shading of a solar panel will effectively kill the output of that panel. And depending on how the rooftop panels are wired (in series or parallel), shading one panel may also reduce the output of other panels on your roof.
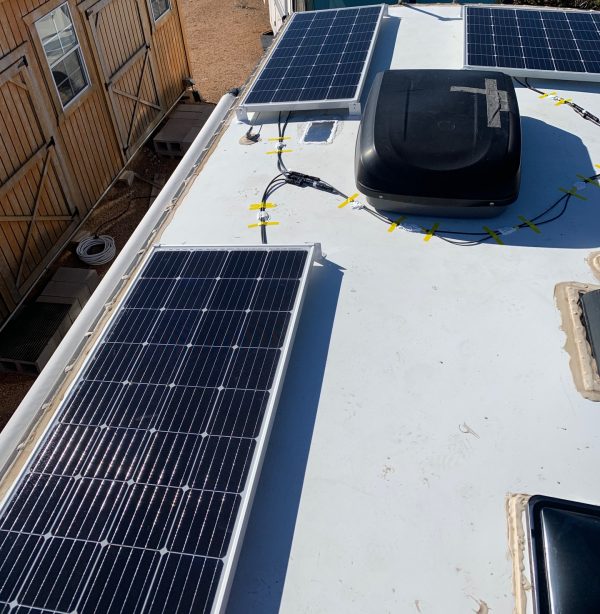
So this means you need to be aware of what is on your RV’s roof that can shade the solar panels. Air conditioners, TV antennas, and roof vents are all great shade producers. Their location needs to be taken into consideration when figuring out where solar panels can be placed.
You also have to consider that the shade produced by these rooftop items will move during the day as the sun rotates around your stationary RV.
Lastly, make sure to also consider what direction to face your RV when setting up camp. You want your solar panels to have the least chance of being shaded and the largest chance of being exposed to the sun as long as possible.
Solar Controller: The Brains Behind RV Solar Panels
The final major piece of equipment you need to consider is the solar charge controller. The solar controller is the brain behind your solar setup. The controller is responsible for taking the output of the solar panel and converting it into a voltage and amperage that can be fed into your RV’s battery bank.
There are two types of controllers available: the PWM controller (cheap but dumb) and the MPPT controller (smart but more expensive).
For low wattage solar systems (including portable solar panels), you will most likely find PWM controllers being used. They are cheap and get the job done on lower output systems. They are “dumb” in that they follow a set algorithm and don’t have the capability of making adjustments during the day depending on cloud cover, battery drain, etc.
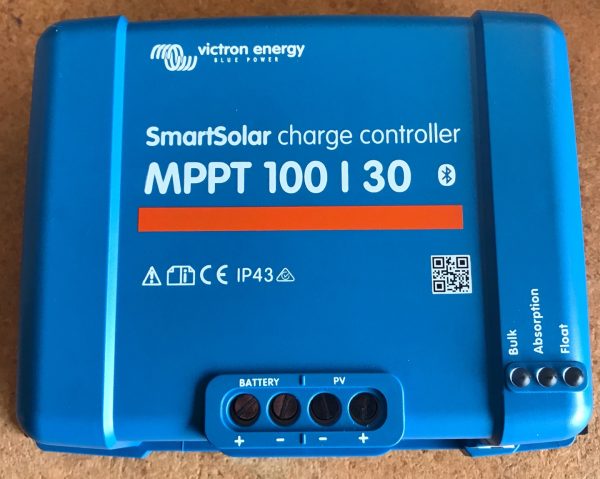
For larger solar systems (the type you’d typically install on the roof of an RV), you’ll want to go with an MPPT controller. This type of “smart” solar controller has two advantages over the “dumb” PWM controller.
What are the advantages of an MMPT controller?
- An MPPT controller can harvest more energy from a solar panel array by taking full advantage of the higher voltage output of the panels and converting all of it into a lower voltage/higher amperage output for your battery banks. They are upwards of 30% more efficient than PWM controllers.
- An MPPT controller is smart enough to sense the solar input, as well as state of charge of the battery and adjust charge modes on the fly. This comes in handy when clouds roll in for a while and then the sun comes back out. The MPPT controller can handle this varying solar input situation whereas a PWM controller just blindly goes along following its pre-programmed algorithm.
- While an MPPT controller will be more expensive than a PWM controller, the overall cost increase will be just a small percentage of the total system cost when you are talking hundreds of watts of solar panels.
What size RV solar panel controller should I purchase?
Another factor to consider is what size of solar controller to purchase. You want one that is capable of handling the input of the solar array size you’ve chosen.
If you have extra room on your RV’s roof for more solar panels, it’s a wise idea to initially purchase a solar charge controller capable of handling more input than you have. This way you can add panels at a later date and not need a new controller.
MPPT solar controllers are rated by how much voltage they can take in (input voltage) and how many amps they put out (output amperage). We chose a Victron 100/30 MPPT solar controller for Kelly’s installation, which means it can handle 100 volts input and can put a maximum of 30 amps to the batteries.
Where should the controller be installed?
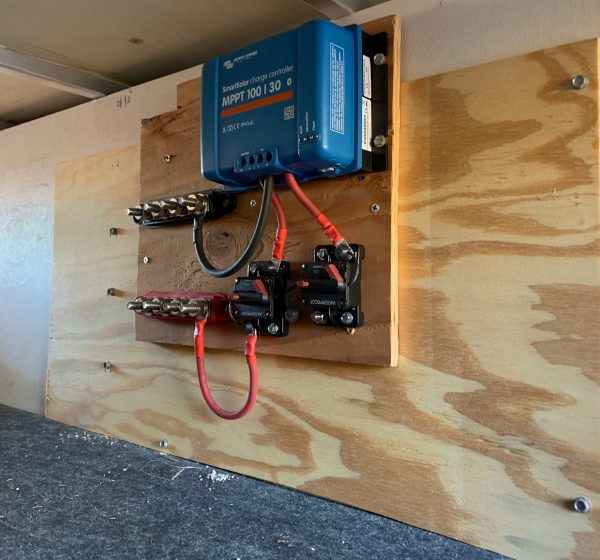
You want to mount the solar controller as close to the batteries as possible, yet out of the weather. Doing so reduces voltage loss from the controller to the batteries
For Kelly’s installation, we chose the forward pass-through storage compartment of her travel trailer. Initially, she had two 6-volt lead-acid batteries mounted on her trailer tongue. She recently upgraded to Lithium batteries that also are mounted in the forward storage compartment. This made for an incredibly short wiring run from the charge controller to the batteries.
Wiring Considerations
The final piece to the solar puzzle is how to connect everything, AKA the wiring. Choosing the right size (gauge) of wires is critical. It is important to ensure a good flow of electricity from the solar panels to the charge controller to the batteries.
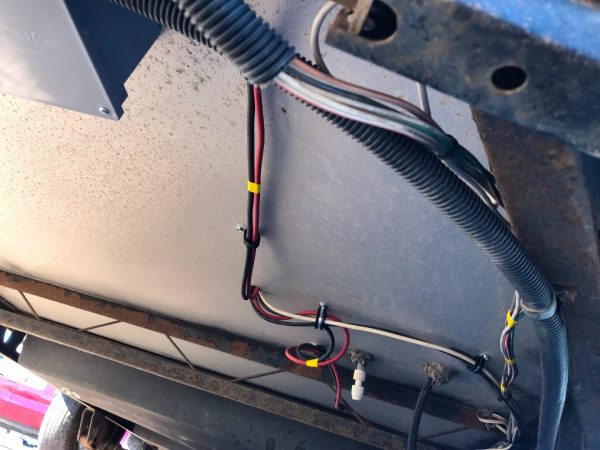
You can think of wiring as being the “pipes” that the electricity flows through. You need to have large enough pipes so that the electricity can freely flow. Yet you don’t want too large of pipes, as this will increase the cost as well as make it harder to run the wiring throughout your RV.
Here are a few notes to consider when it comes to wiring your RV’s solar panels:
- Use pure copper wiring.
- The voltage will drop as electricity flows through wiring. The smaller the wiring and the longer the distance, the more the voltage will drop.
- Make sure the wire size (your “pipe”) is large enough to minimize this voltage drop so your solar system runs as efficiently as possible.
- Look to keep voltage drop below 2%. You can use an online voltage drop calculator to easily figure out what wire size you need based upon the distance you need to go and the amount of power you want to move.
- You will also need to figure out where to run the wires. This includes getting the wiring from the solar panels on the roof, down into your RV, to your solar charge controller, and then to your batteries. Yeah, this part can be “fun.”
RV Solar Panel Wiring Example
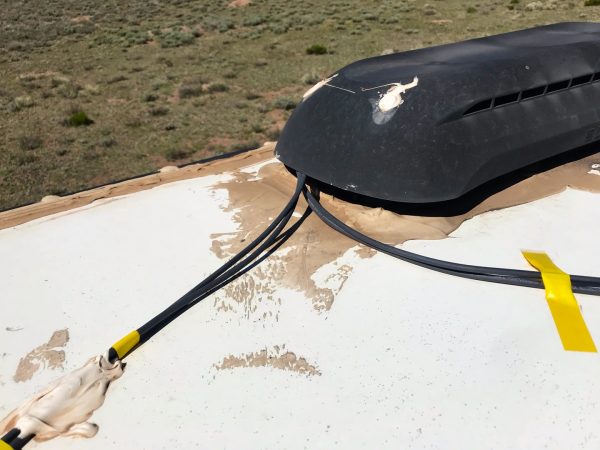
Kelly’s travel trailer is fairly simple compared to a large Class A motorhome, so her wiring run was pretty easy to figure out. We ended up using the refrigerator roof vent as the entry point thru the roof.
We wanted to avoid drilling more holes in her roof. We passed them down thru her pantry cabinets to under the rig, then along the belly to the forward baggage compartment where we drilled a single hole to get the wiring inside.
A larger, longer RV may require some more creative thinking when it comes to wiring runs. Ultimately, you need to find a way to get the wires through the roof and to the compartment where the solar controller is located and then to wherever the batteries are. (All using a minimum amount of wires and drilling as few holes in your RV as possible!)
Are RV Solar Panels for Me?
You should now have a basic idea of what it takes to plan the basics of an RV solar panel installation. Keep in mind that this is a very high-level overview. Every installation is going to be different, and tackling this on your own is not for the faint of heart.
I put off the planning for Kelly’s install for months. I knew it was going to take many hours of planning, and I wasn’t looking forward to it. Now that it’s done, the next one won’t be so daunting. However, it isn’t something I recommend you take on yourself unless you have some mechanical and electrical knowledge/skills — you will need them!
If you are interested in a more detailed overview of how I planned Kelly’s solar installation, you can read the solar installation planning blog on Camp Addict.
Marshall Wendler is the co-founder of Camp Addict (FMCA Commercial Member C013759), an RV product education website. As a full-time boondocker, he relies on solar power to keep his RV batteries topped off.


WOW! WOW! I have an existing one on my 2019 Tiffin RED. So I need to know what I have NOW in addition to what else/replacement items I WILL need.
Richard Medlock, I have a ’19 Tiffin Allegro Open Road and am about to start my own installation. The factory pre-wired the RV for solar installation so I shouldn’t have to run more lengthy wires. Problem is the service desk told me that the factory installs the charge controller in the cabinet above the driver’s head, and runs a pair of wires from there to the roof for the panels, and a LONG pair (~40-50′ with turns?) to the battery compartment under the rear on the opposite side. Everything I’ve read is that a long run from the controller to the battery bank is “bad”, and the configuration they described is the worst possible arrangement. Since you already have a system installed, where did they put the controller? Was it that far from the batteries?
Solar panels are one of the most eco-friendly, quietest and cleanest power source. Outfitting your vehicle with a solar panel makes it possible for you to enjoy the benefits of free source of power. In fact, a good and reliable RV solar power installation gives you the opportunity of charging your batteries independently.